This week I thought I would go for a simple use case and run through the straightforward steps of how you can replicate this within your Signagelive Network.
This example is going to take on a corporate communications layout, but this is not limited, you can use layouts for whatever use case you need or want, and at Signagelive we have a great selection of free Layout Backgrounds you can use for different verticals, such as Corporate communications, QSR, Education and Retail.
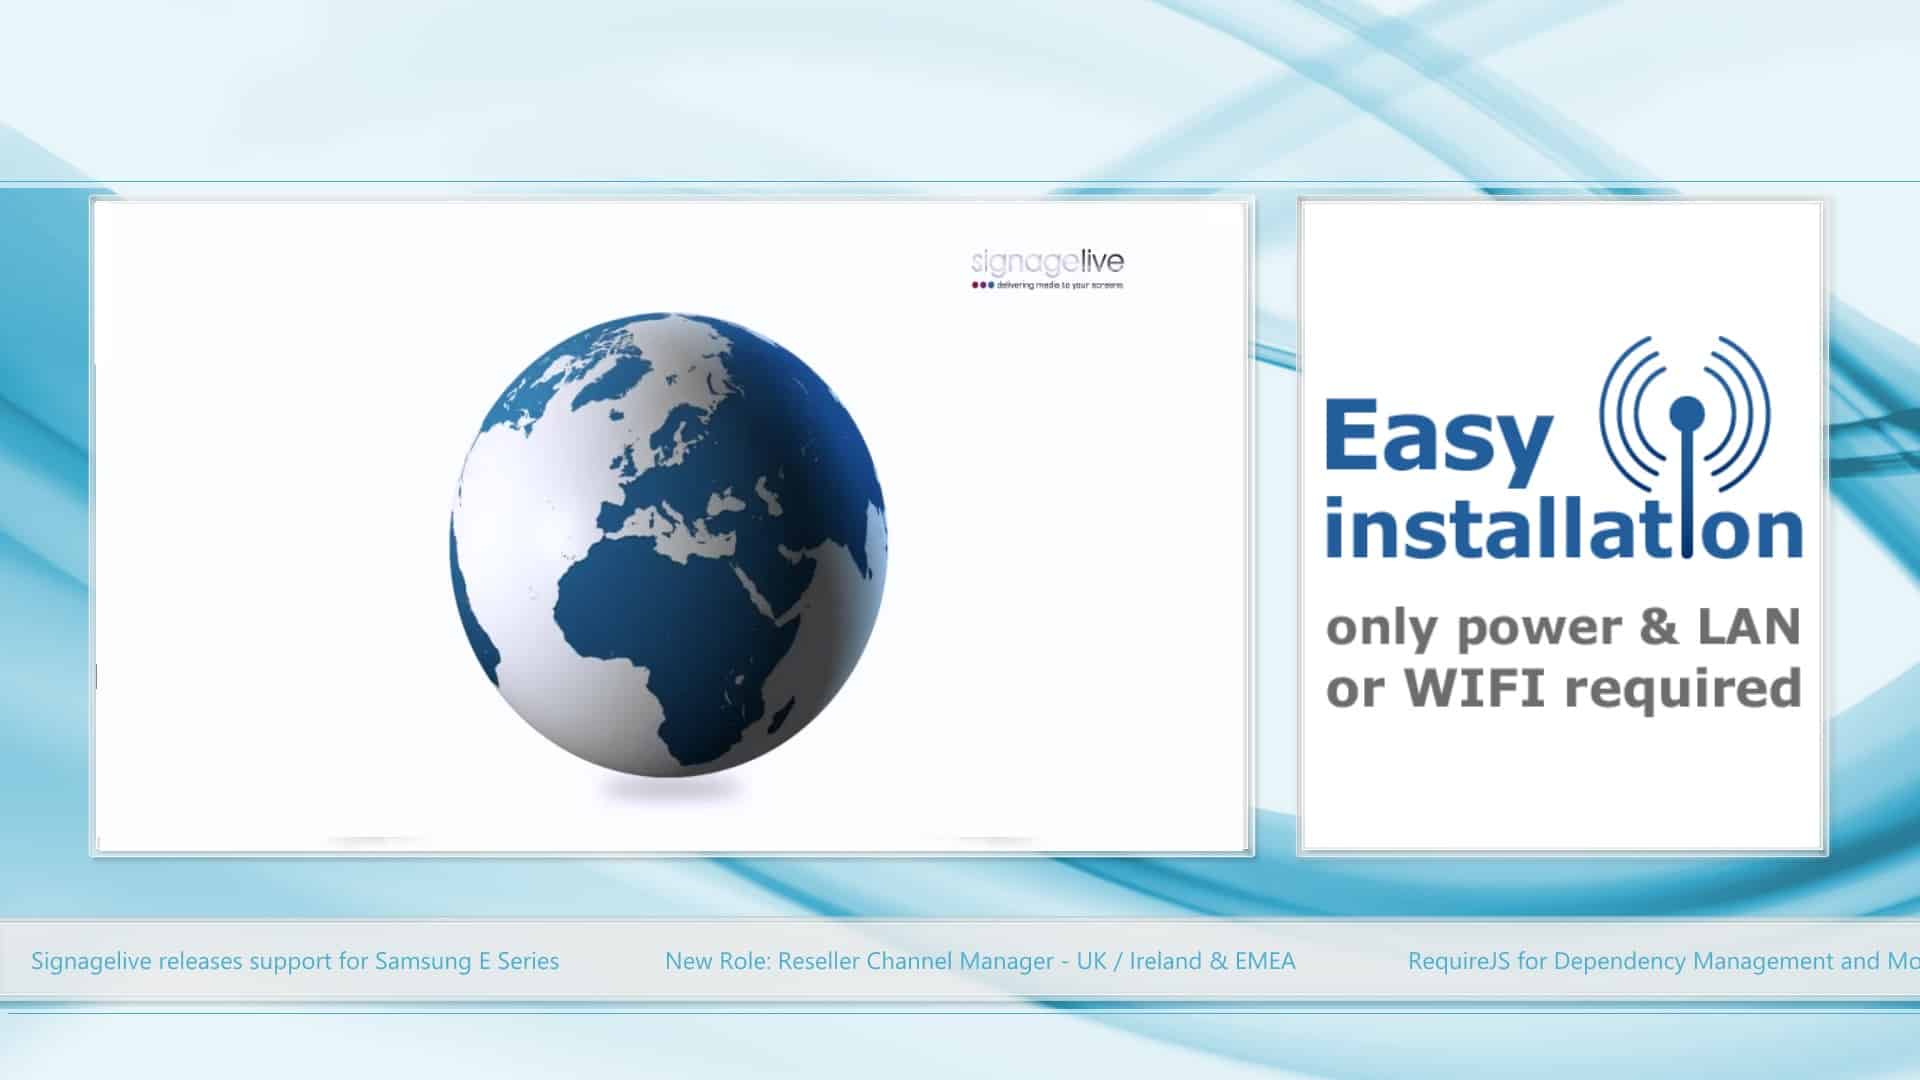
I thought it would be good to take the multi zone layout shown below, and show you how to replicate this in 5 steps.
1. Create a Layout
The first step is to actually build the Layout within Signagelive. In this example we are using a background image as a “template” for the layout, but you don’t need to do this, you can have a blank background or a colour/gradient.
If you want to use a background image, then we have some you could use for different verticals, just get in touch and we can help you out.
[av_video src=’http://youtube.com/watch?v=aG-OphWA9lM’ format=’16-9′ width=’16’ height=’9′ av_uid=’av-28p2pww’]
We create the Layout by setting a resolution, this is just to help us design the layout, and will be scaled by Players when it is published to fit their resolution if it is different. For this example we are going to make a Full HD Landscape layout, so the resolution is 1920 x 1080.
There’s a big space at the top of this layout, which we can put a company logo, if we choose, so we will add the Signagelive logo to the Layout as a static image zone.
When we release our Widget support which is currently being worked on, you could also add some nice clock and/or date widgets to the top.
We then want to add the 3 different zones which will be used for showing content, there are 2 Schedulable zones and one RSS ticker zone.
You just need to drag and drop these on to the layout, and drag them out to match the sizes of the background areas.
At this point we won’t actually set any content in any of the zones. This comes in a later step, although it is possible to set default content, which would show if nothing is scheduled to the zones.
We can, though, set up the RSS Ticker to perform in the manner we want, with selections defining, the way the text moves, the speed it moves and if there is a separator image between items in the feed.
For more detailed documentation on working with Layouts head over to our help centre.
2. Create a Playlist for the Hero Zone
What do we mean by a Hero Zone? The hero zone is basically the biggest zone on a layout. This is where your main content is going to be shown.
For this example we are staying simple and just adding a single video, but you could schedule any content you would normally schedule within a fullscreen publication, such as images, videos, IPTV streams or Live TV (on supported models?).
[av_video src=’http://youtube.com/watch?v=6t-2jAyNndk’ format=’16-9′ width=’16’ height=’9′ av_uid=’av-1rhrmgg’]
This would be a great place, if you are using your player for Corporate Communications, to put a message from the CEO or other management staff, which could be broadcast live or pre-recorded as a video.
So all we need to do in this example, is find the video we want to use in the Asset Library, and add it to a new Playlist.
Then Save the Playlist and we are done.
For further help with creating and managing Playlists, heres a link to our help centre section on Playlists.
3. Create a Playlist for the right hand zone
In this example we’ve got a single right hand zone, which we are going to use to show some information which relates to the content being shown in the main zone.
This would be a great place to put simple text notices, which could be built using Message Manager, or maybe some KPI information that is taken from your business solutions, for example, how many Support Calls are open or current Sales for the month.
4. Add an RSS Feed for the ticker
You can link to RSS Feeds that are available on the internet if you wish, or you can use Signagelive to build your own.
In this example we are going to build our own. This is done from the Message Manager Template Editor, but instead of creating an item with an image as a background, we just need to add a number of Feed Items which only include text.
[av_video src=’http://youtube.com/watch?v=qpHngVTk1-Y’ format=’16-9′ width=’16’ height=’9′ av_uid=’av-190wv80′]
Once this is built, it will be added as an Asset in the Asset Library to be used straight away.
You can also then give Users Message Manager access for this feed, which means that they would be able to add, edit and remove items from the feed from their mobile or tablet.
5. Publish the Layout to a Player
So we’ve created all of the component parts we need, and all we’ve got left to do is actually publish the layout to a Player or set of Players.
We will be scheduling this to play from now until the end of our Licence for simplicity, but you can set this to display just for a certain period of time, or using recurrence patterns fit within other scheduled content.
Of course you can also schedule content for the future, so you don’t have to be updating Signagelive in real time, you can plan your content changes in advance. This can be particularly beneficial for a restaurant with different items in the menu for breakfast, lunch and dinner for example.
[av_video src=’http://youtube.com/watch?v=xUqBZ1EUHqU’ format=’16-9′ width=’16’ height=’9′ av_uid=’av-vxyzps’]
So once we’ve decided the schedule we are publishing, we select that we are publishing a Layout.
Choose the Layout we want to publish, and then we get to decide on the content that will be published in each of the zones.
Again within each of the zones, we can set up different schedules, just as if they were full screen publications themselves, but for this example we will just be setting one Playlist for each zone to play all of the time.
We click on each of the zones individually, select the schedule and then choose the Playlist we want to Publish. The only difference is for the RSS Zone we are just going to choose the feed, rather than a Playlist, which we could do, so that multiple RSS Feeds are included in the ticker.
Once we’ve set up the content we then choose the Players we want to Publish to, and the next time they check in, they will download their new configuration and start showing the Layout we created.
So in 5 easy steps you’ve got a good looking multi zone layout, you can use throughout your business for communications. If you want to give it a go, why not download the background I’ve used from here.


You must be logged in to post a comment.